
progressus imprimis
progressus imprimis
Toni's PQ Tutorial
|
Portions of this tutorial are specific to the Ubuntu
package version. Mostly, though, it is general to whichever
platform you call home.
-ed
|
This article is not a full guide for playing Progress Quest, but only an introductory tutorial taking you straight to the battlefield. You may wish to read the official user guide to gain a deeper understanding of the game itself. The official user guide will also be available locally at /usr/share/doc/pq/pq.html once you have installed Progress Quest.
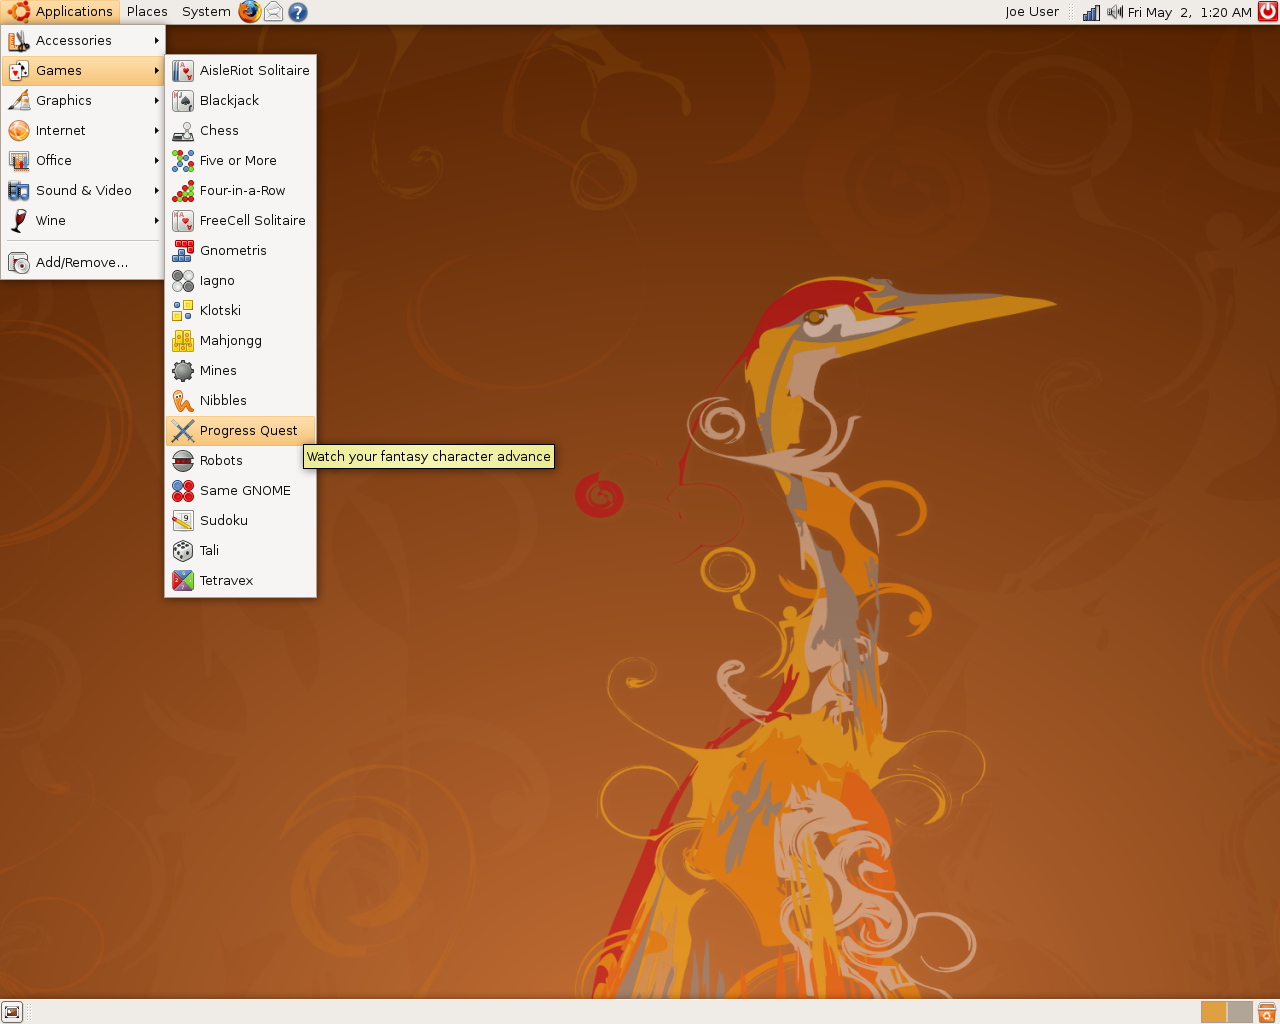 Launch the game by clicking on the Progress Quest menu
item from the Games menu, which is located under Applications.
Launch the game by clicking on the Progress Quest menu
item from the Games menu, which is located under Applications.
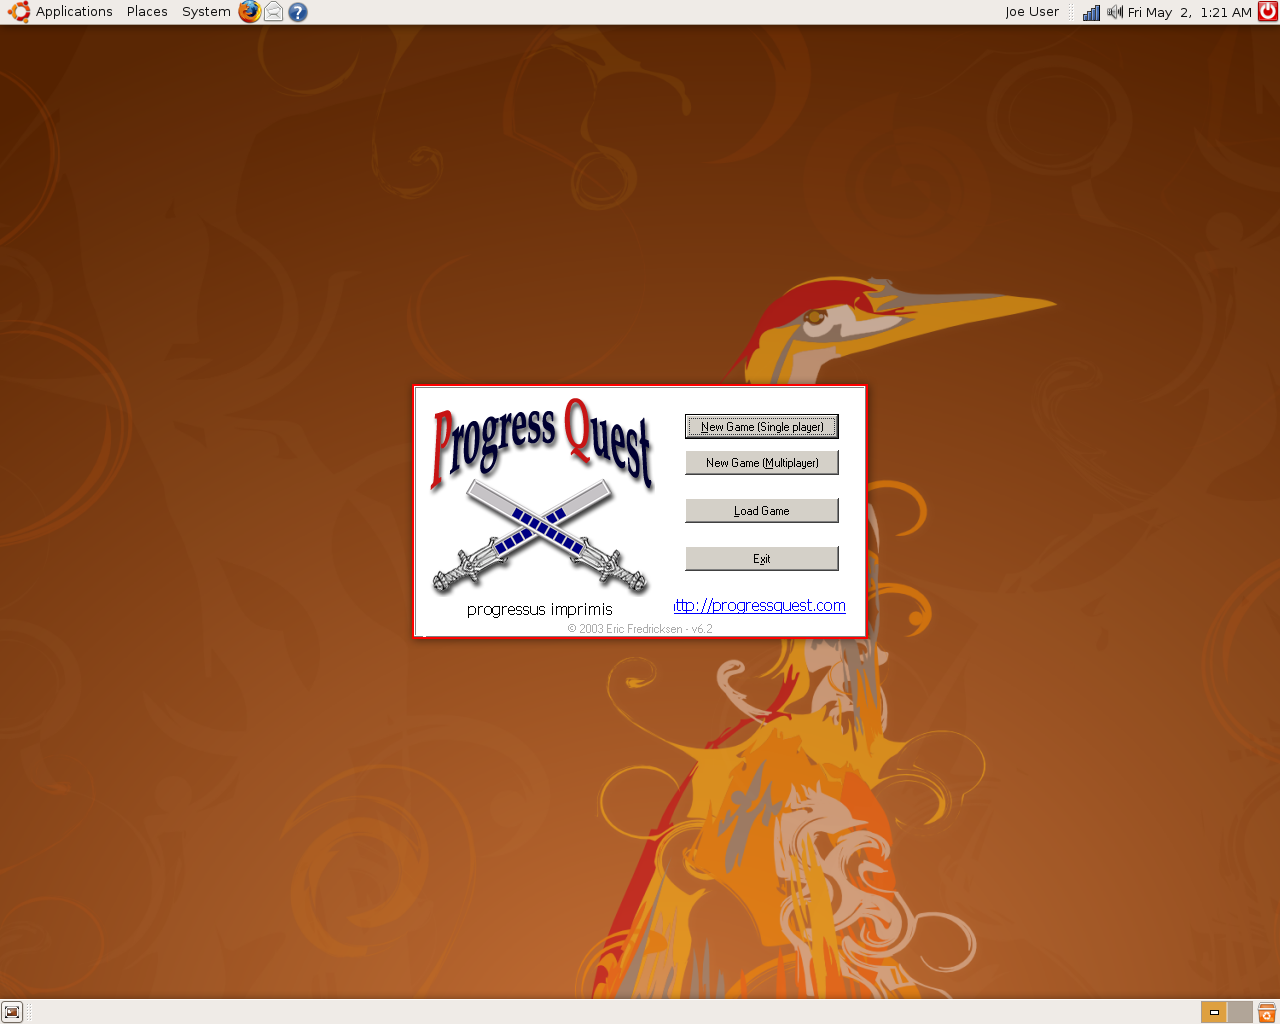 Progress Quest greets you with some Latin. There are four menu options in the main menu. In this tutorial we'll demonstrate how Multiplayer games are played.
Single player games are almost the same in terms of user interaction. The Load Game option allows you to continue your previous Progress Quest sessions.
Sometimes you may accidentally click on Progress Quest menu item, while you are trying to launch the game Robots. In such a case you might have to click on Exit. Progress Quest is of course no worse than Robots, but playing Progress Quest in parallel with other games has been made easy for you. Thus it is often possible to have your Progress Quest character advancing at full speed, while you are playing a nice game of Robots at the same time.
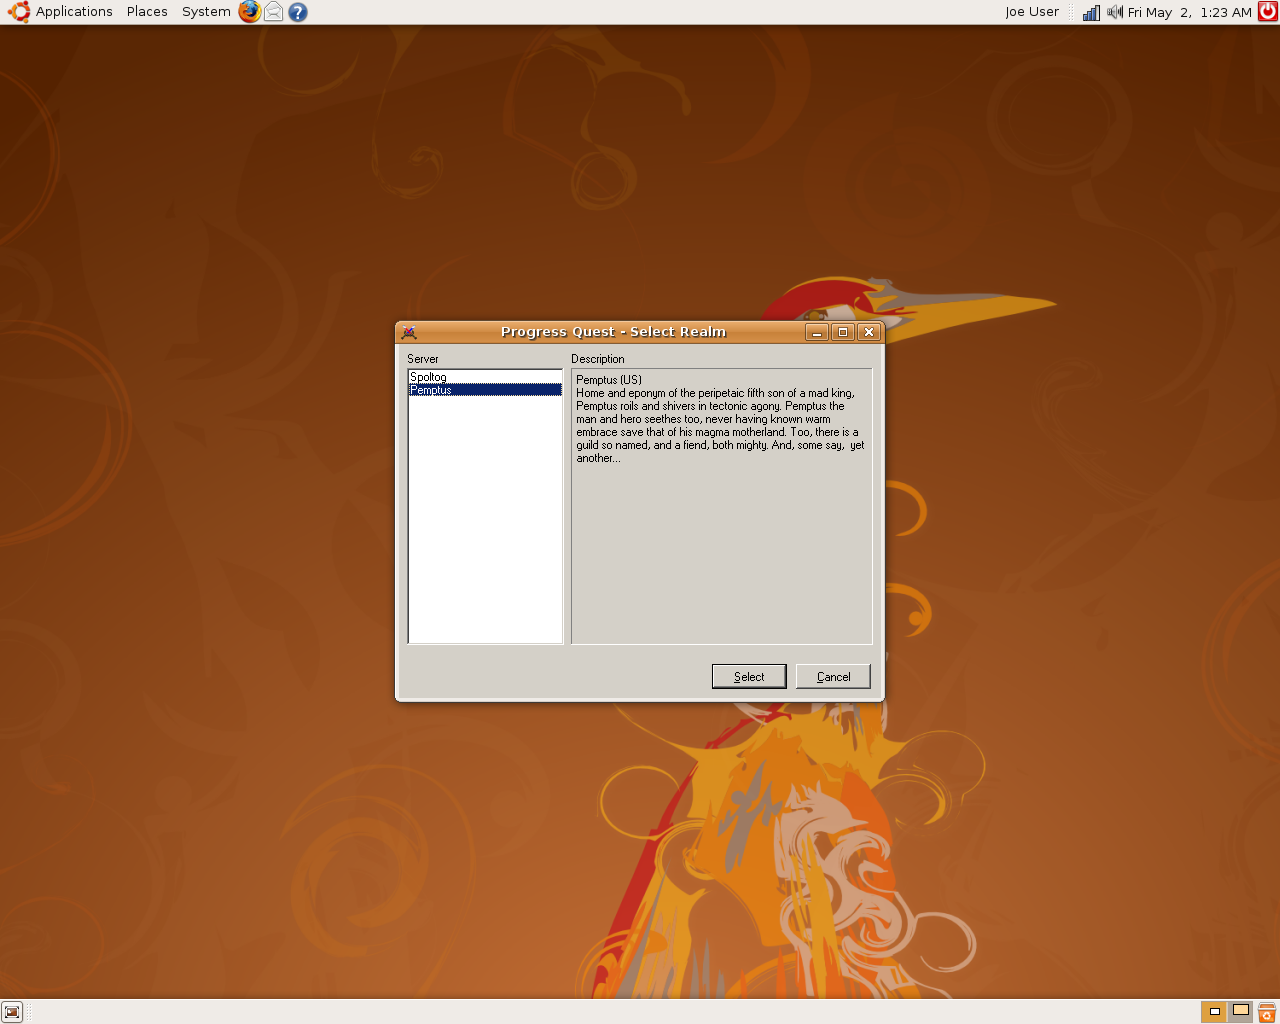 After starting a multiplayer game we get to choose a realm within which our quest is going to take place. In this tutorial we choose the newbie friendly Realm Pemptus, which does not require you to have an user account at progressquest.com.
In a single player game you don't get to choose a realm, so skip
this phase in the single player case.
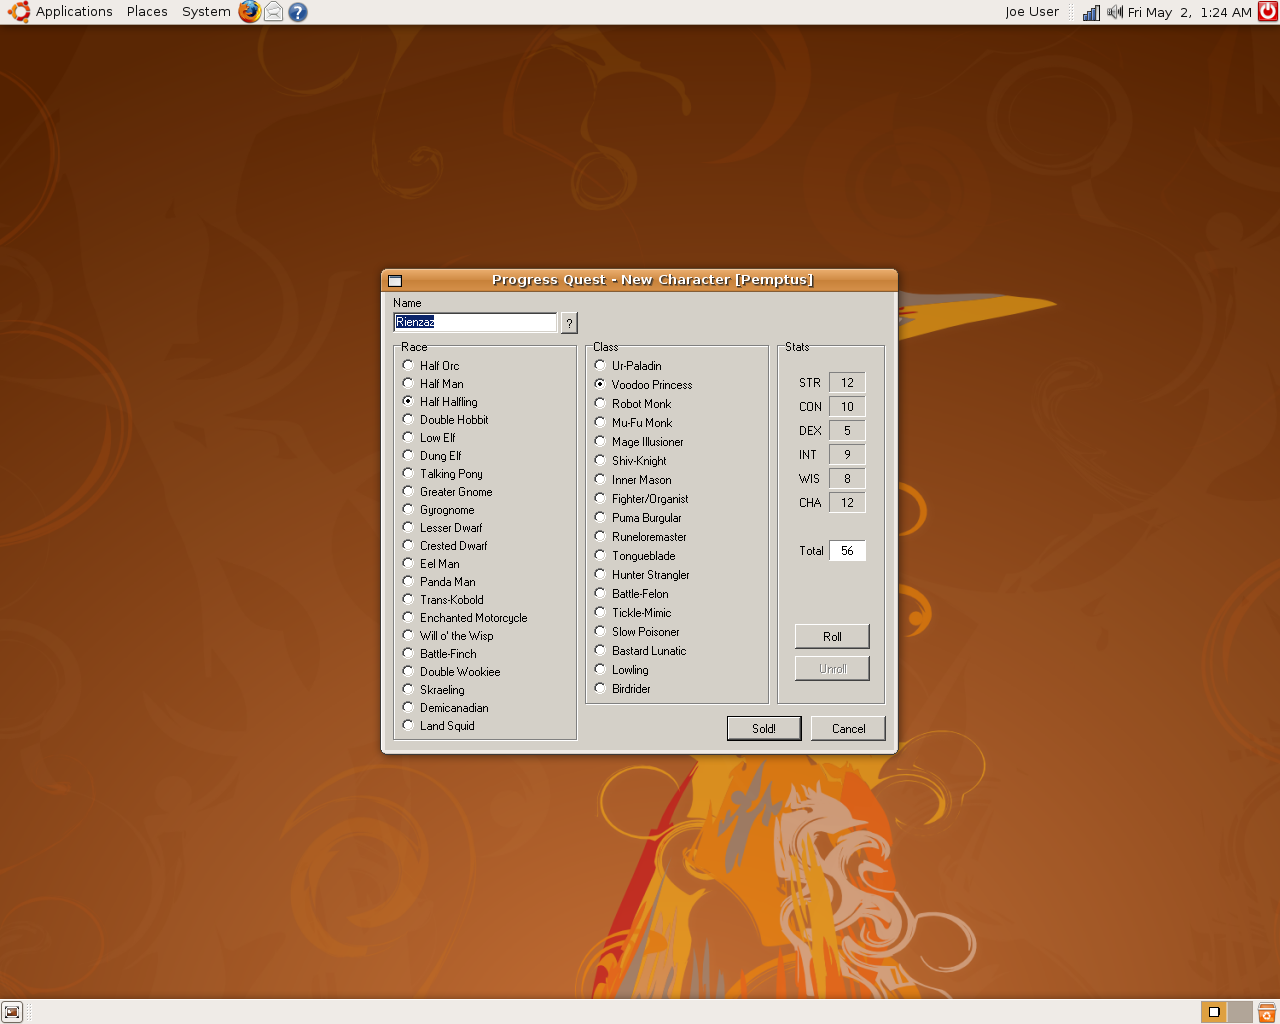 At this point you will make the most important choices, which are going to affect your character throughout the whole game.
You get to choose your character's name, race and class. You may either type in a name for your character or create a random name by clicking on the ? button. Race and class have to be chosen from the given list of options.
 Stats are automatically rolled for your character. If you are not happy with the stats you get, you may use the Roll button to reroll your stats; if you do accidental rerolls after an especially good roll you can press Unroll until you get back to those stats.
Progress Quest characters have six different stats: strength (STR), constitution (CON), dexterity (DEX), intelligence (INT), wisdom (WIS) and charisma (CHA).
When you are happy with the details, click on the Sold! button to start the game.
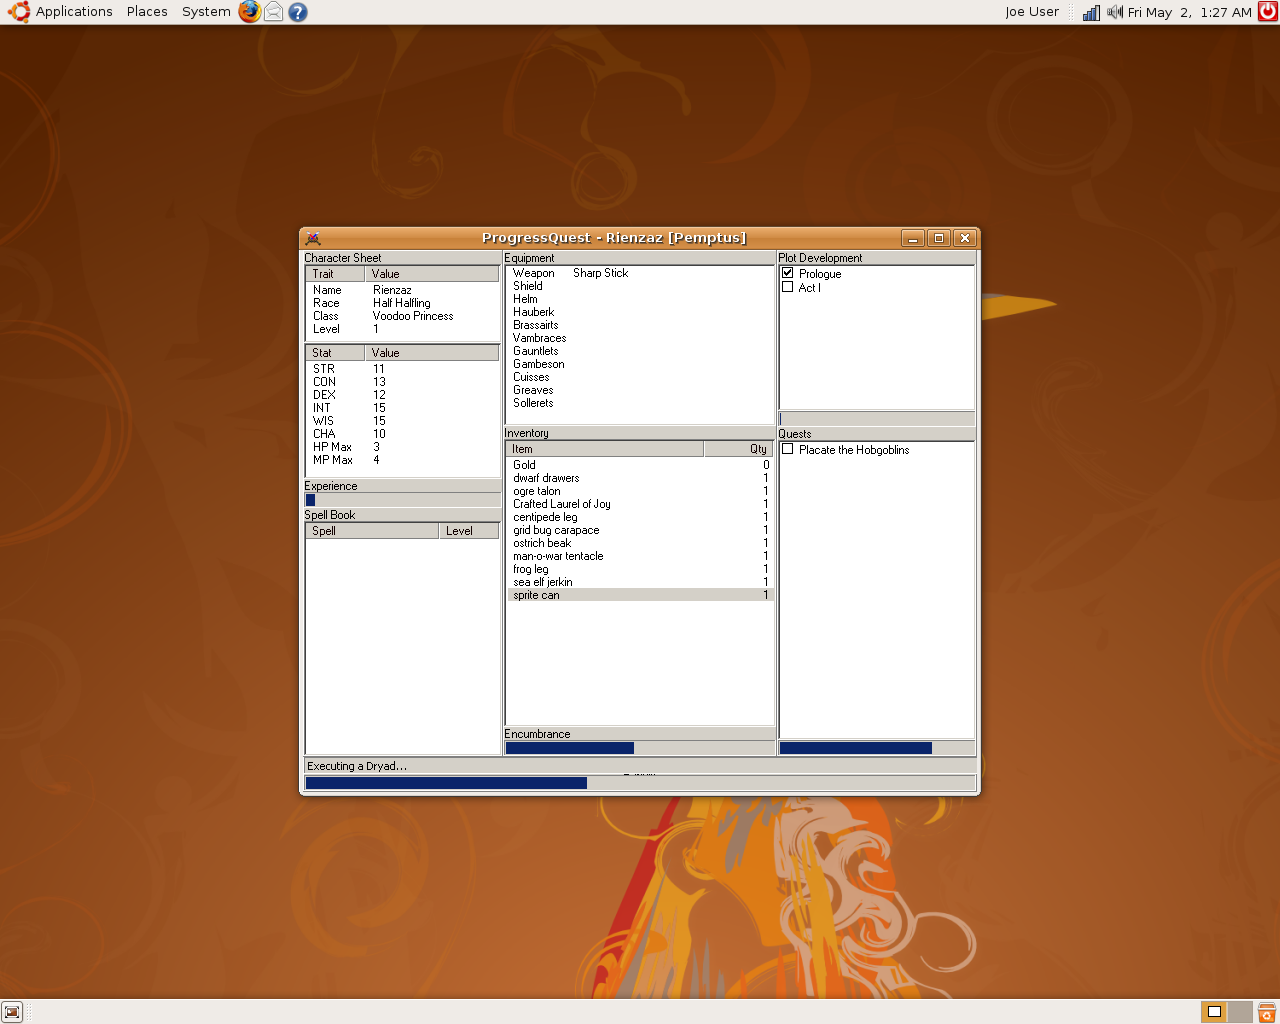 It's on! At the bottom of the screen we can see what is happening right now. The wide progress bar on the bottom shows the progress of that event.
There are four more progress bars - the Experience bar shows how close you are to gaining a level; the Plot Development bar shows how close you are to the next act; the Encumbrance bar shows the amount of carrying capacity you are currently using to carry all your stuff, and finally, the Quest bar shows how close you are to completing your current quest.
In addition to progress bars the user interface has some checkboxes that show plot development acts and quests. Once an act or quest is completed, the checkbox magically checks itself. The upper left corner shows your stats. There are a few stats that you did not encounter in the character creation phase: Level is your character's current advancement level; HP Max shows the maximum hit points your character can have on a good day; MP Max shows the maximum magic points your character can have.
In addition to all of this, there are three tables: Spell Book lists the spells you have; Inventory displays the stuff you're carrying around; and last, but not least, Equipment shows not only the weapons you use in battle, but also the protective gear you wear to defend against enemy blows.
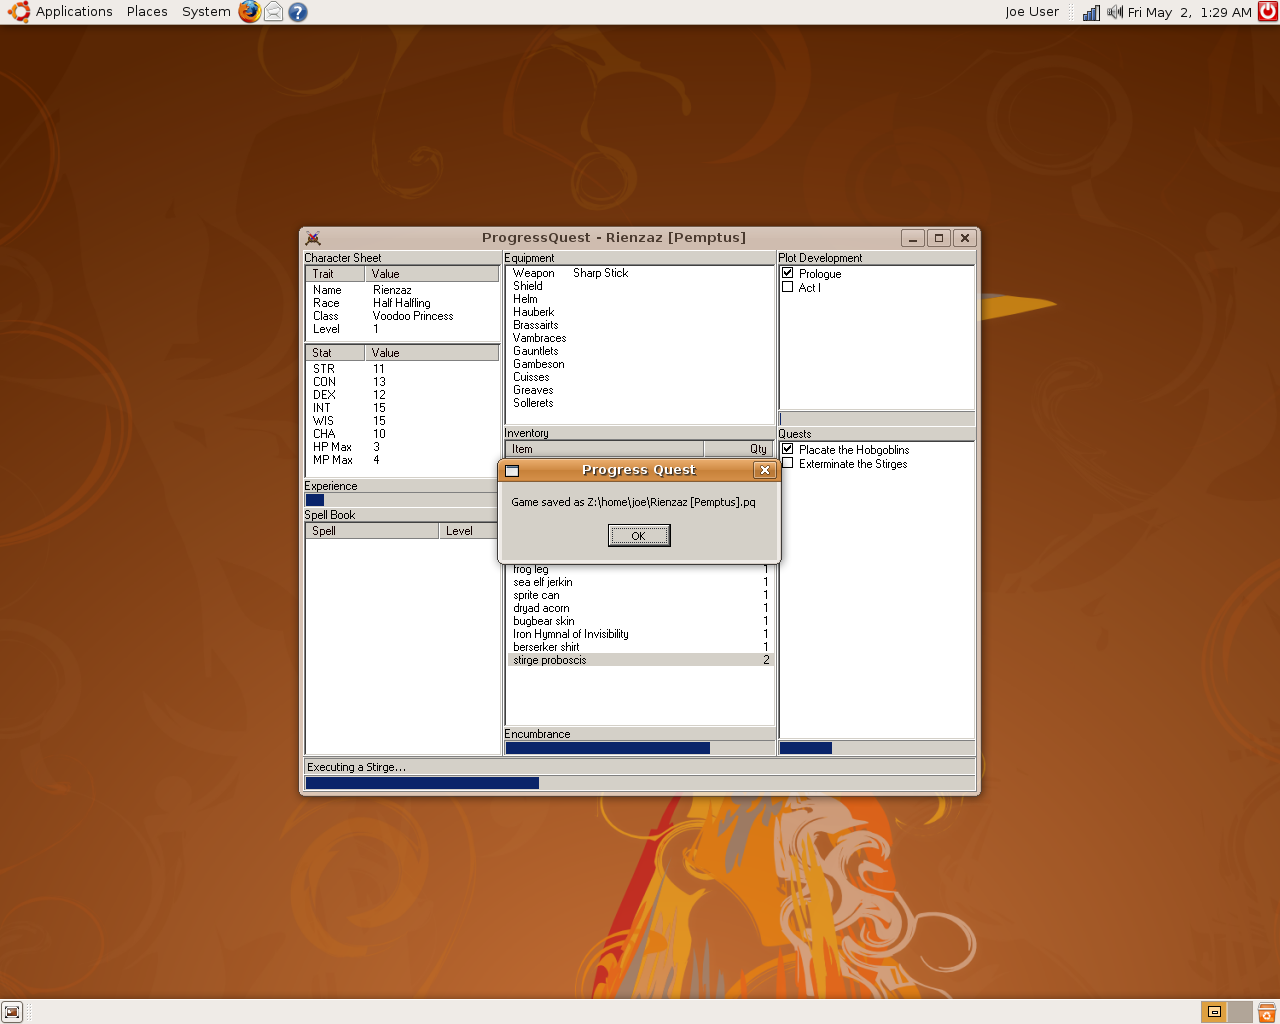 When you want to save the game and quit playing, just close the window. A pop-up window will appear reporting a game save. The save files are stored in your home directory. Just ignore the weird looking path appearing in the message.
You can restore a saved game by selecting Load Game from
the startup menu. When you do this, you are provided with a file
selector that allows you to choose a game file to load.
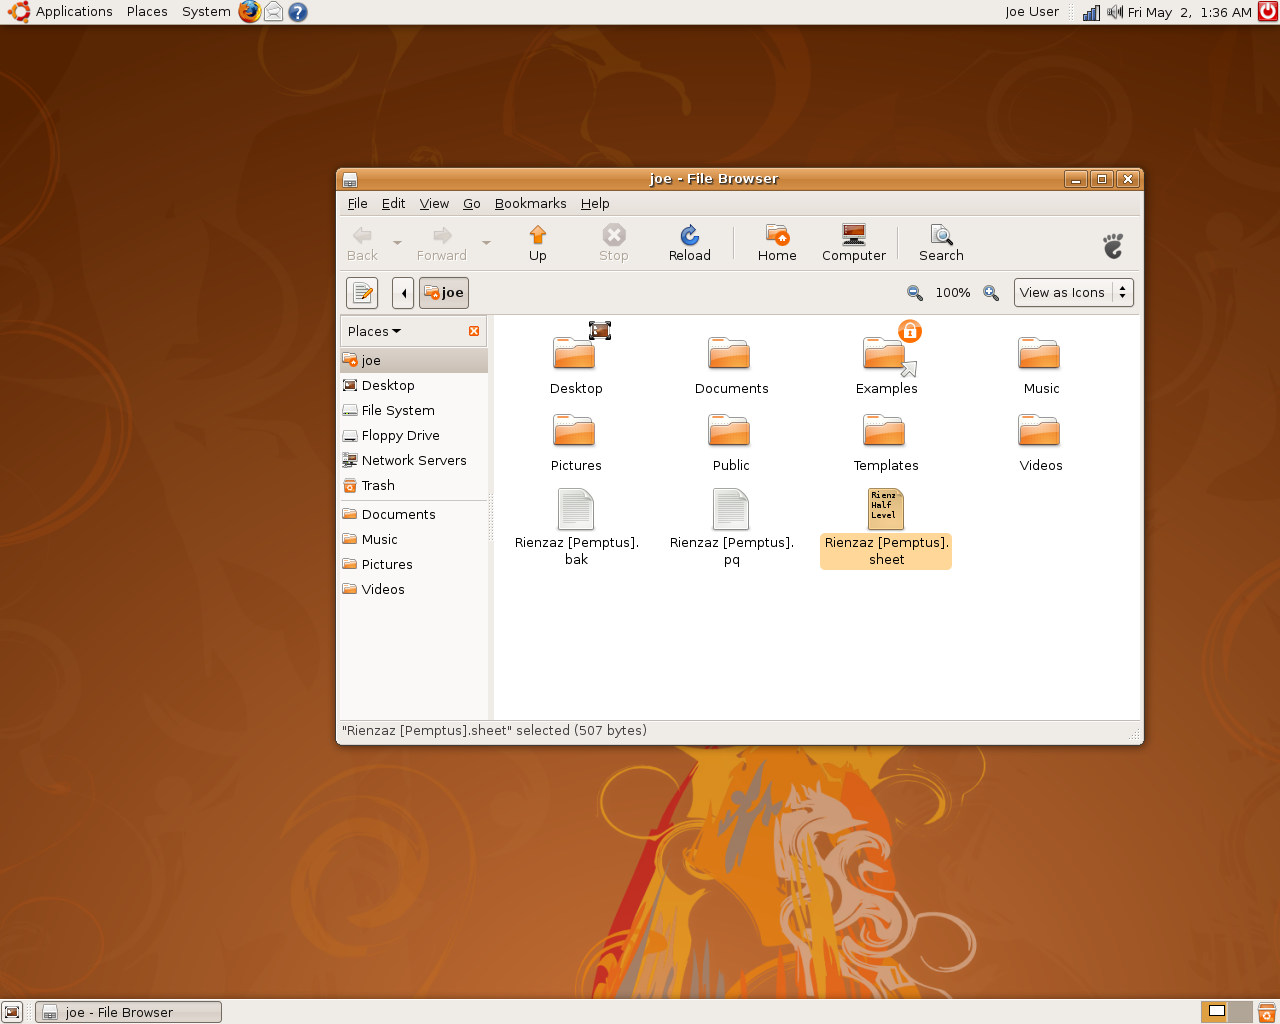
 Alternatively, you can navigate to your Home Folder from the Places menu.
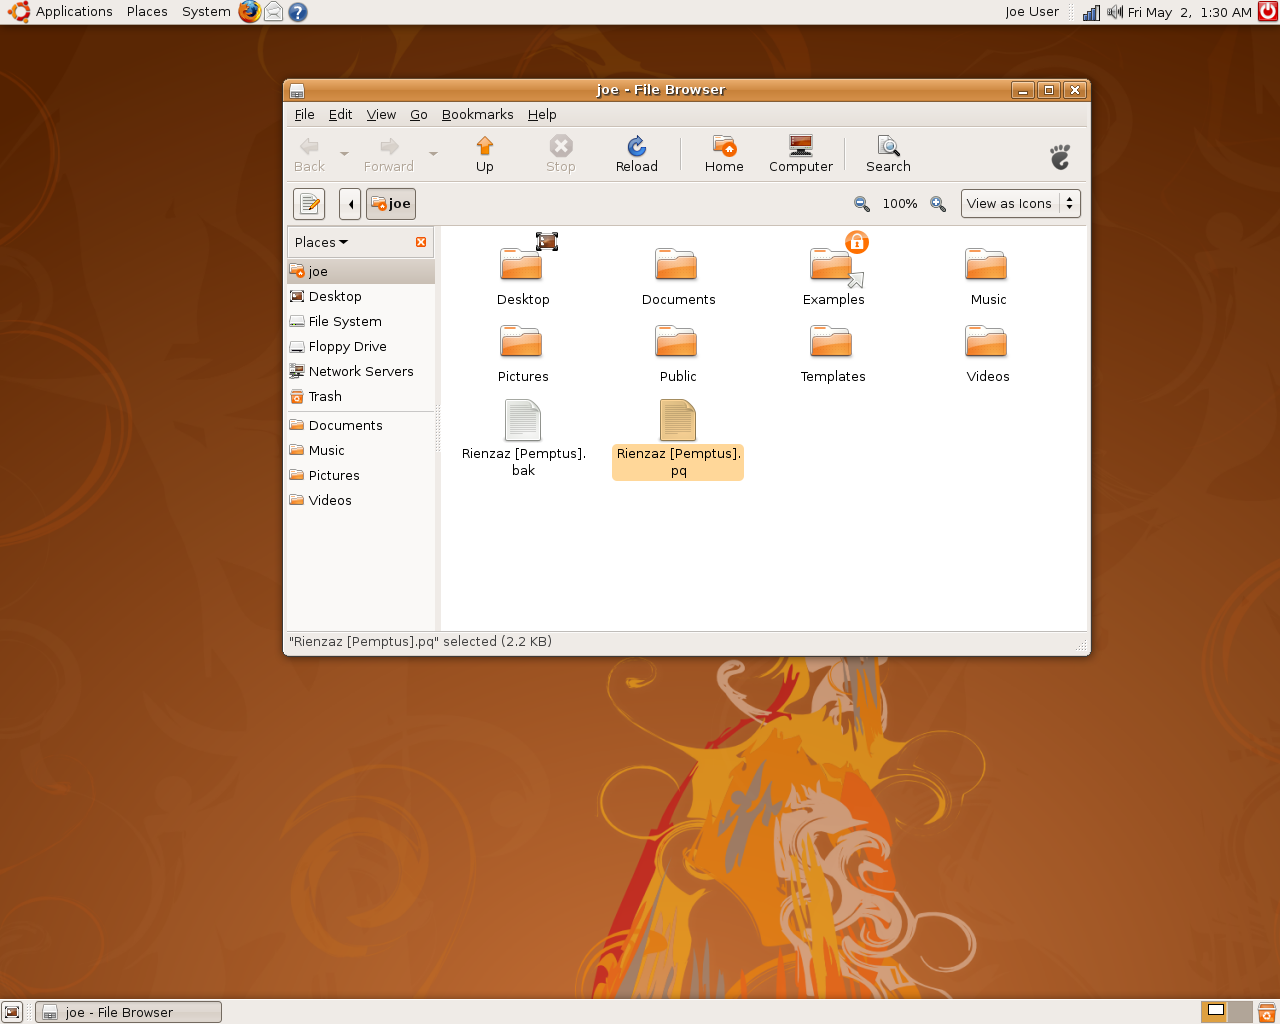 In your home folder you will find the save file, as well as a backup of it.
You can restore your game from here by double clicking on the save file.
In your home folder you will find the save file, as well as a backup of it.
You can restore your game from here by double clicking on the save file.
You may be able to restore your game from the backup file, if something goes wrong.
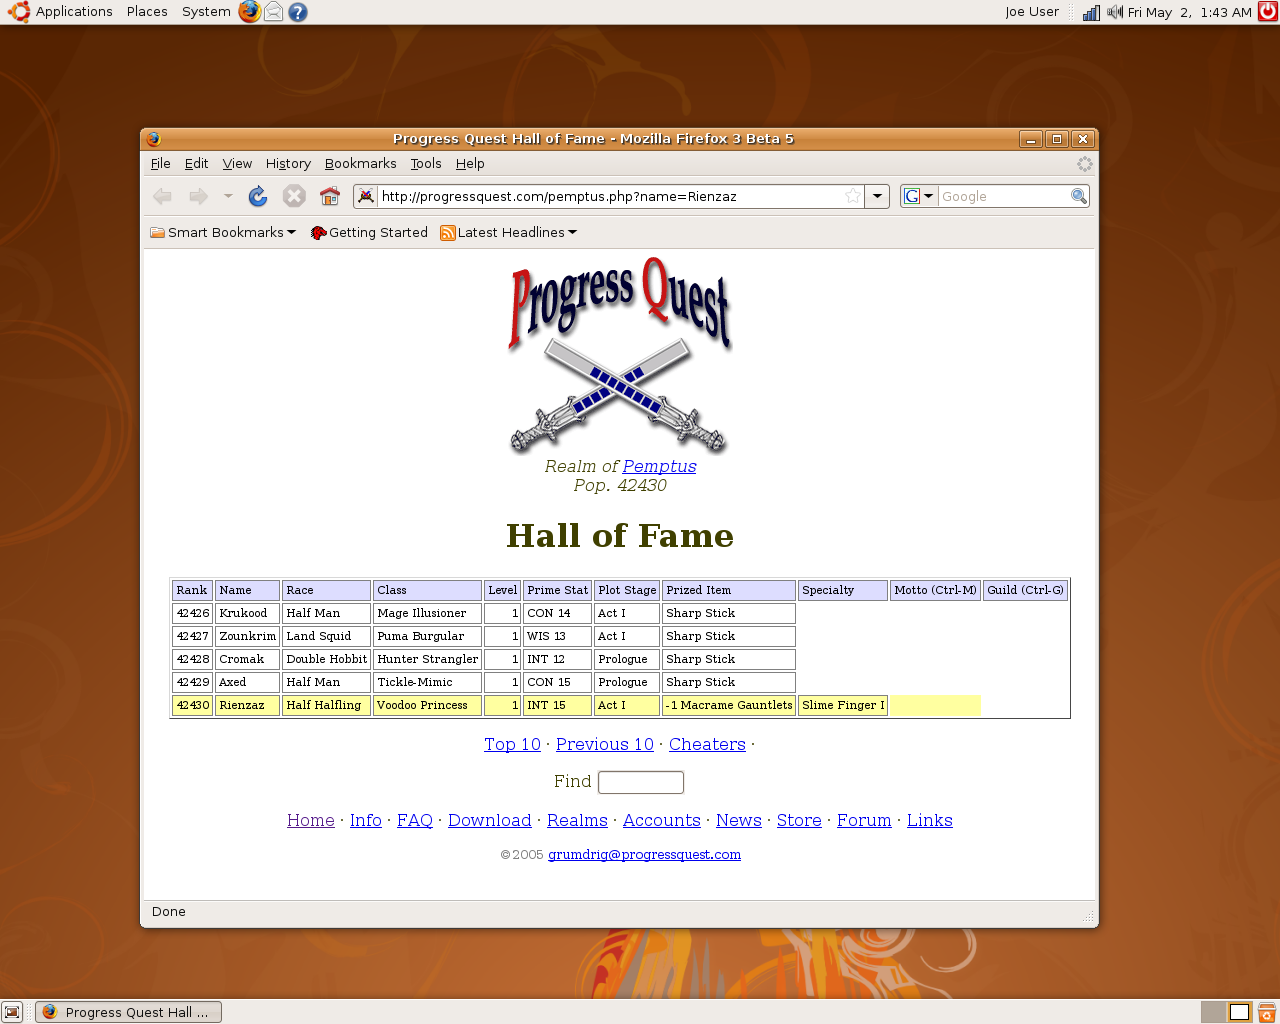 Information about each multiplayer character is hosted on the realm pages. The pages are useful when you want to show your character to other people.
Some more serious players take on the battle against downtime in a realm of their choice. They compete day and night hoping that they will one day be in control of the most powerful character in that realm.
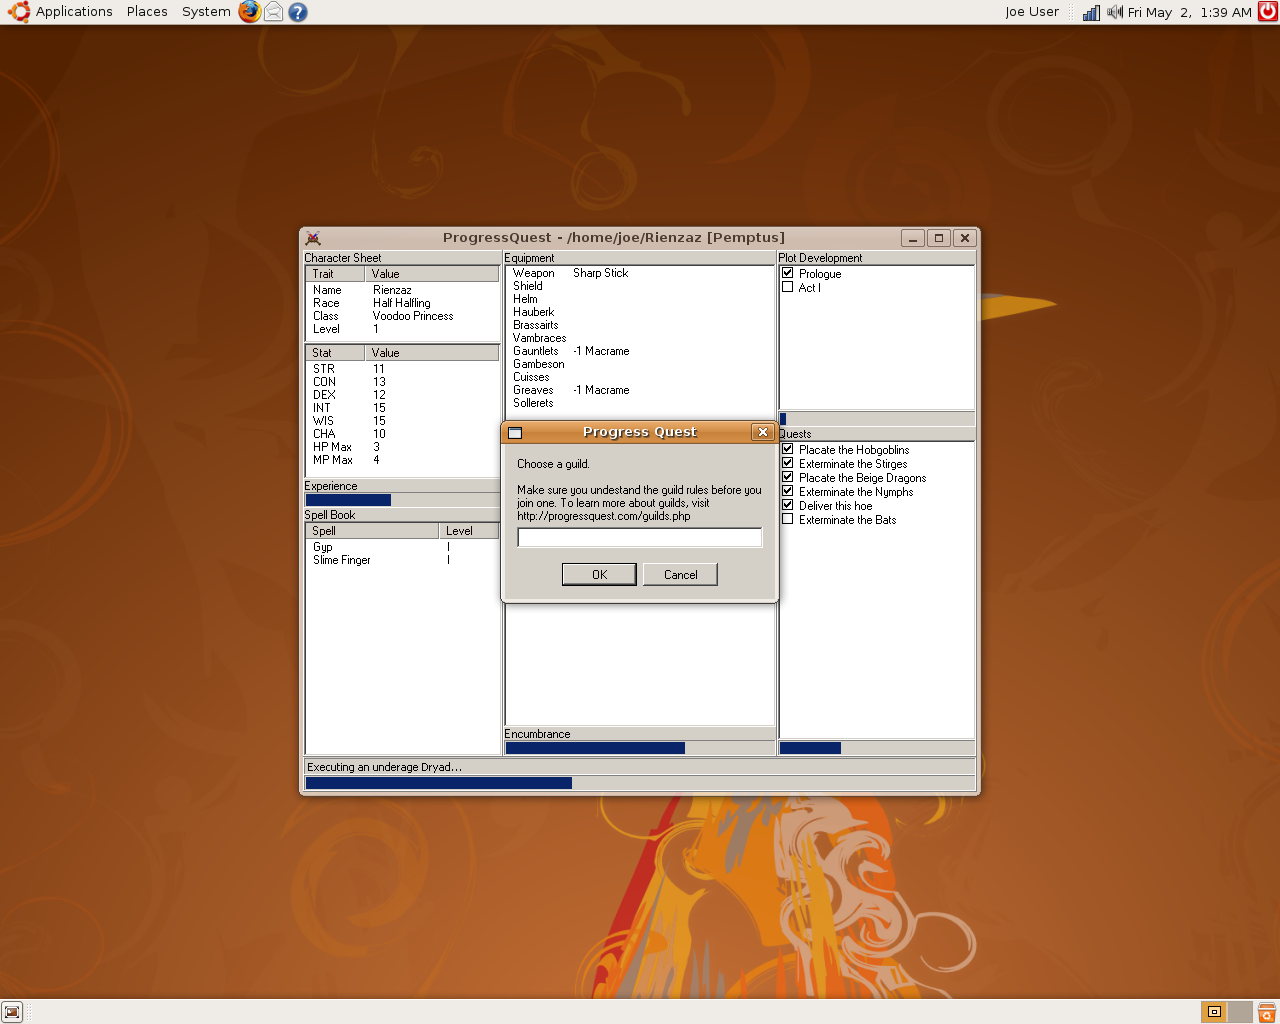 In multiplayer games, you can join a guild by pressing the G key while holding the Ctrl key. You are asked to enter the name of the guild that you wish to join. For more information about guilds, check out web pages about the realms.
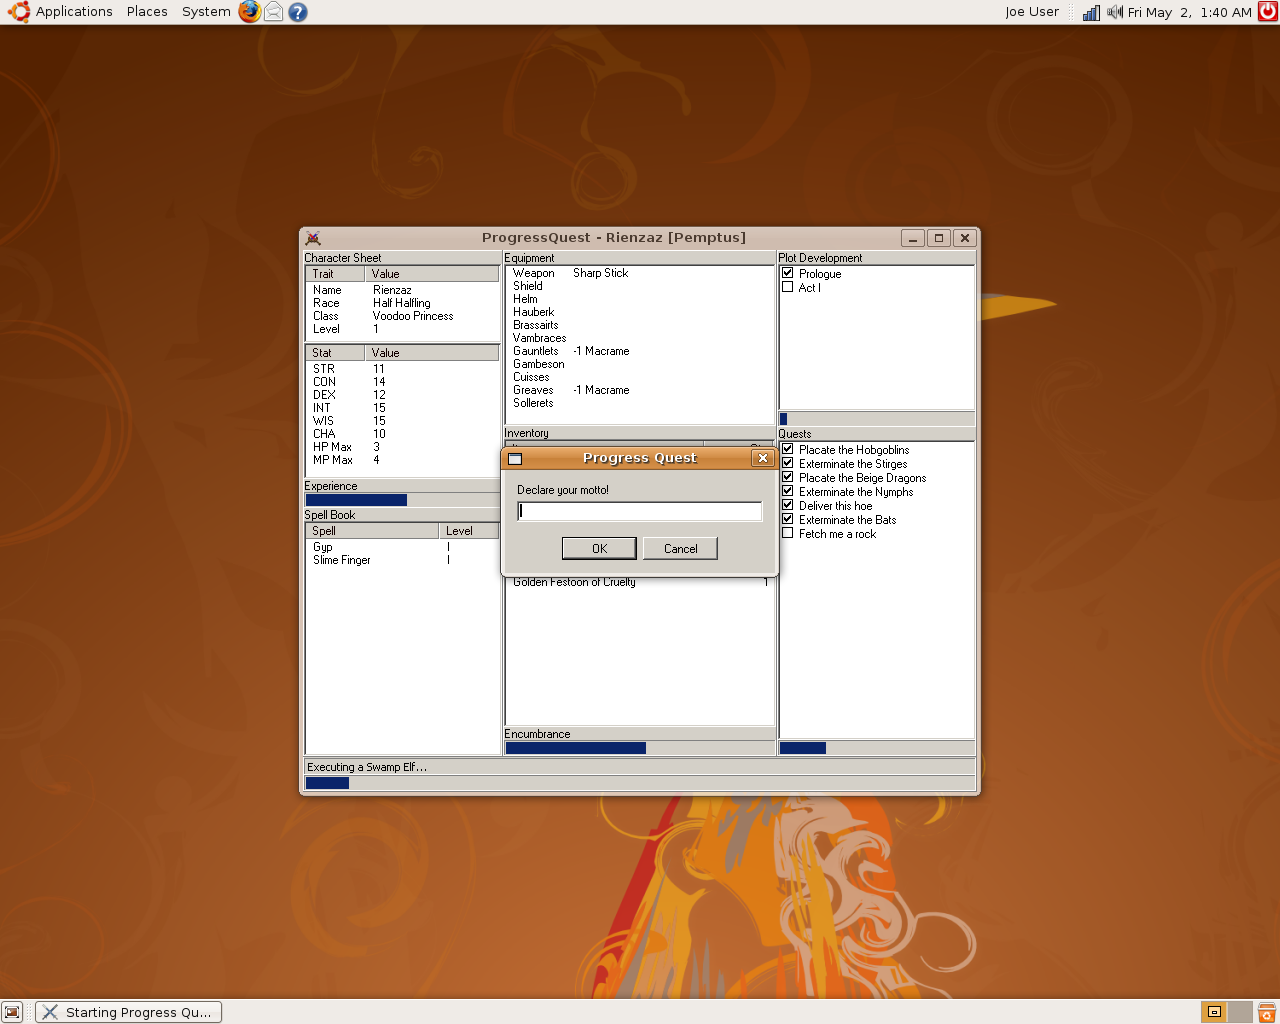 In multiplayer games, you can also set a motto for your character. Press the M key while holding the Ctrl key. The game asks you for your new motto.
You may export your character into a character sheet file. Character sheet files are text files that contain information about your character.
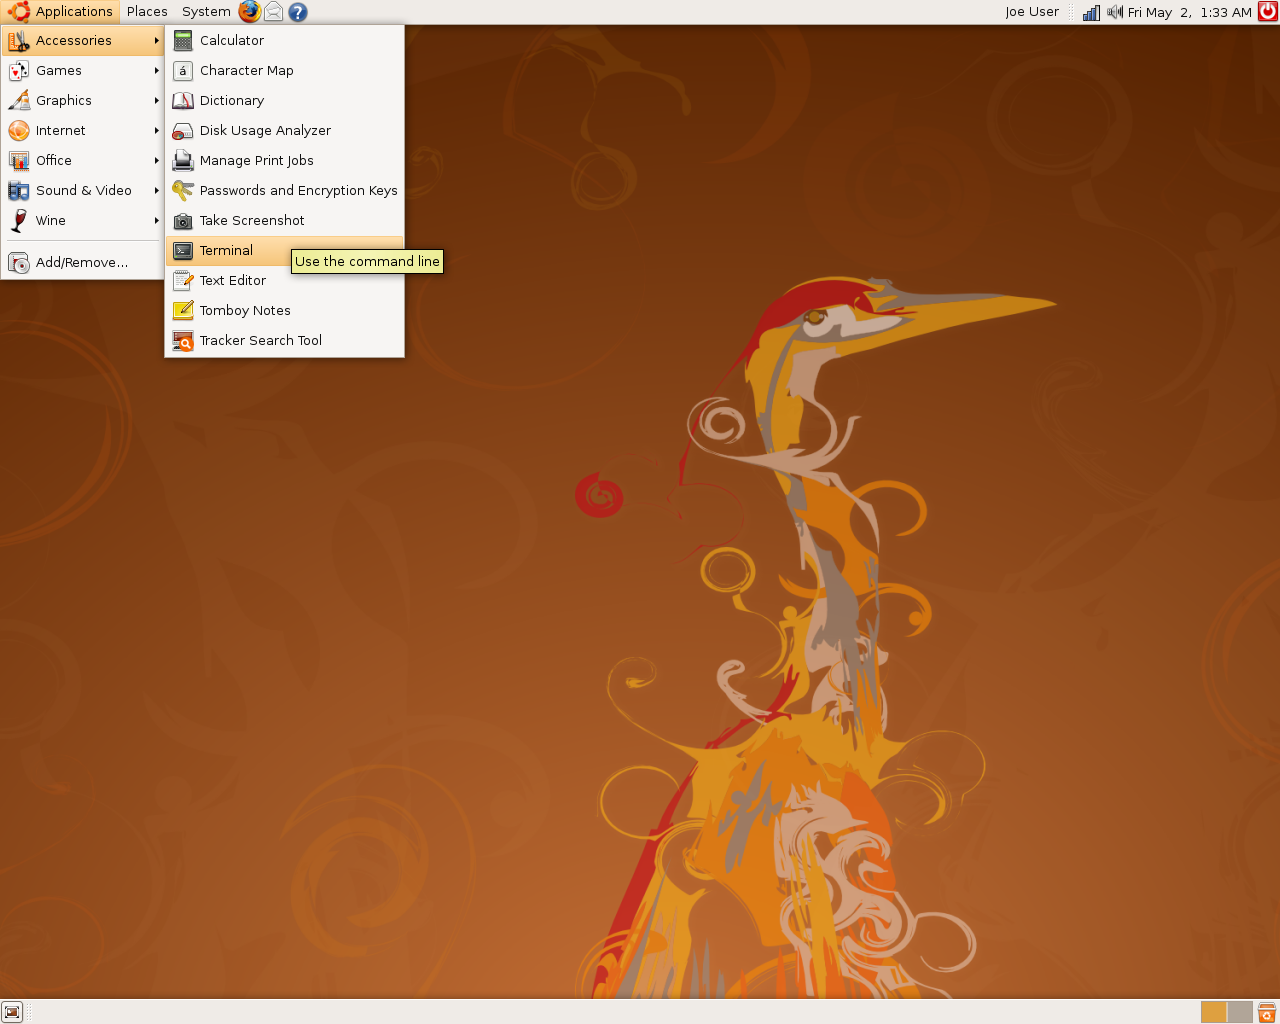 To export a character sheet for your character you need to open a terminal window. Select Terminal from the Accessories menu, which is located in the Applications menu.
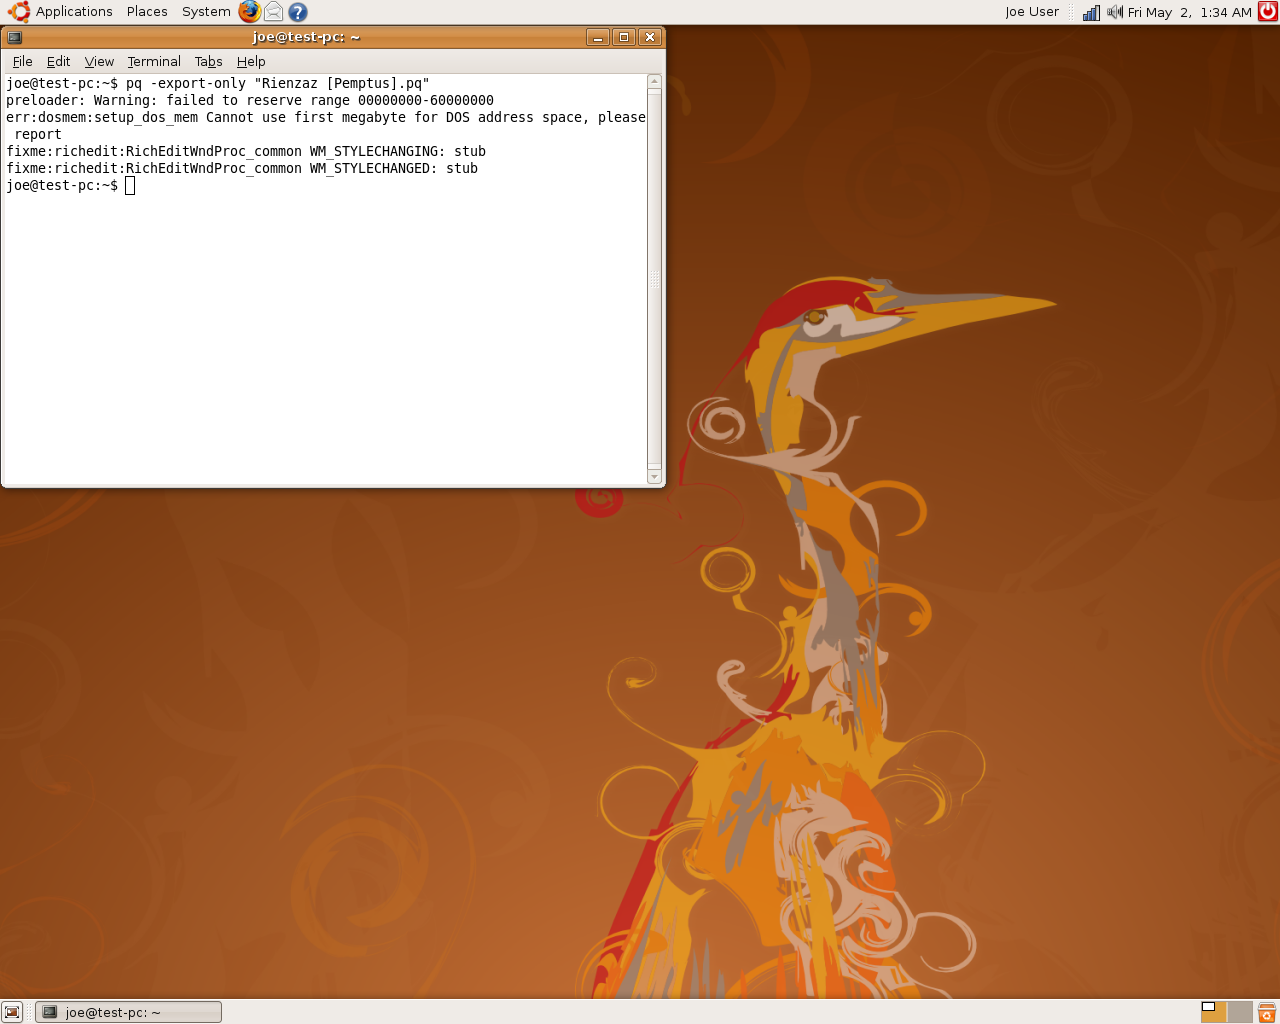 Once the terminal window opens. Type in the following command pq -export-only "savefilename.pq". Replace savefilename.pq with the filename of your saved game. Then press the return key to run the command. After you have done so, you may close the terminal window.
The command prints some debugging messages that may look awful. Just ignore them. The messages are there for experts. They list things that might have gone wrong.
If you wish you may change -export-only to -export, if you do this the game will get launched and the character sheet will be exported periodically. Run the command man pq to see a manual page with some more advanced switches you can use.
 Running the command should make the sheet file appear in your home directory. You may double click on the file to view it in a text editor.
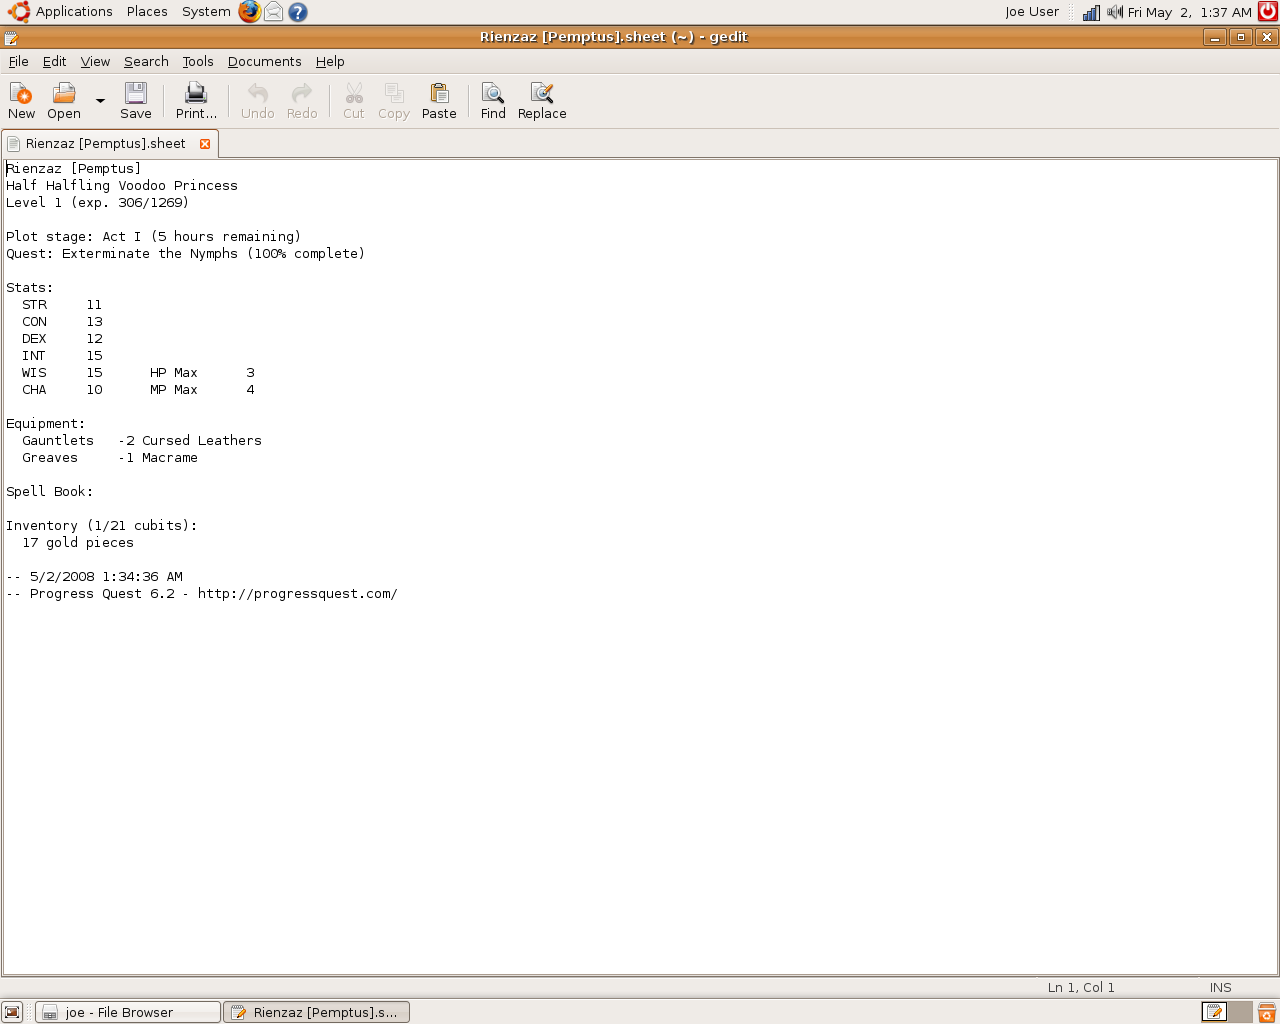 While you can look at the character sheet in a text editor, this is not something you would normally do. The game itself is more suitable for watching your character advance.
There are, however, various more sensible uses for the character sheets. You might send a file to a friend in order to show him how you are doing in a single player game (in a multiplayer game it would be easier to use the realm web pages).
You could also write some scripts that are able to read the sheet and, say, plot your progress on a graph that you can then upload to your web site. These are just examples. The possibilities are endless.
Home · Info · FAQ · Play · Download · Realms · Accounts · News · Store · Forum · Links
 This document by Toni Ruottu is licensed under a Creative Commons Attribution 3.0 Unported License.